Wood holder
Back story
Nothing says summer like spending a Saturday night around a nice fire with a couple of friends and some cold drinks. To store all that nice wood, I built a nice rack that we’ll keep most likely behind the shed. The fireplace is nearby and the she would hide it from plain view because, let’s face it, it’s not the prettiest look in the world. And if case you were wondering, this project is pretty fast to do; after all, I did do it over my lunch break.
For this project, I used:
Tools
Materials
| Qty | Material |
|---|---|
| 50 | #8 Screws – 2″ |
| 5 | 2 x 4 – 8-foot |
How I went about it
-
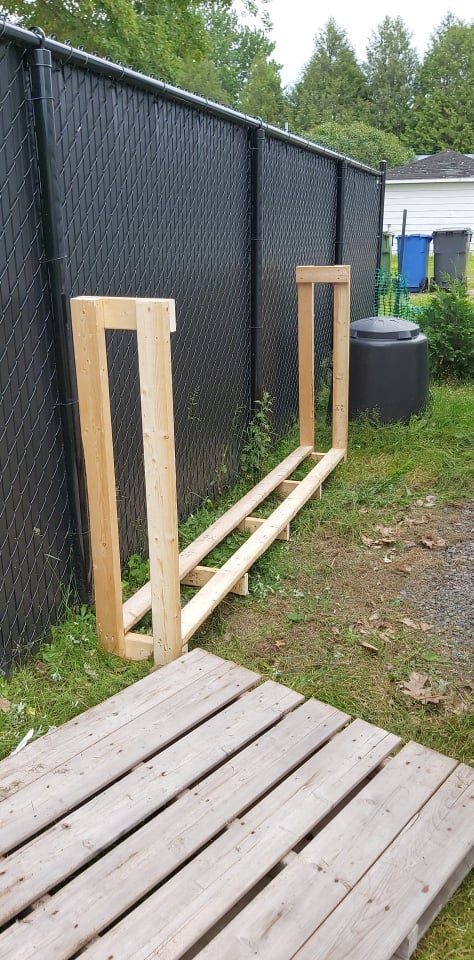
Cut the 2x4's
- 48 inches (4 pieces)
- 96 inches (2 full pieces)
- 12 inches (7 pieces)
-
Built the sides
I laid out two 4-foot (48″) pieces and screwed a 12-inch piece over both pieces on either end, the wider part perpendicular to the length of the legs.
-
Join the sides
With both sides built, I laid out both 8-foot pieces between the sides making sure to put the longer pieces over the 12-inch pieces to rest above ground to avoid any issues with water and snow on the ground.
-
Additional support
I screwed in 3 more blocks spread out evenly under both 8-foot pieces. This will have multiple uses: first, we’ll have more support to prevent the base to bend (or break) under the weight of wood. Secondly, this also helps to move it around (remember, this was done over my lunch break, so I didn’t have a second pair of hands!). Lastly, the additional pieces will serve as something solid to screw into if I need additional support later on*.
* I may eventually add another 8-foot piece across the top which I’d secure with vertical pieces, so this will have a double purpose.