Plant stand
Back story
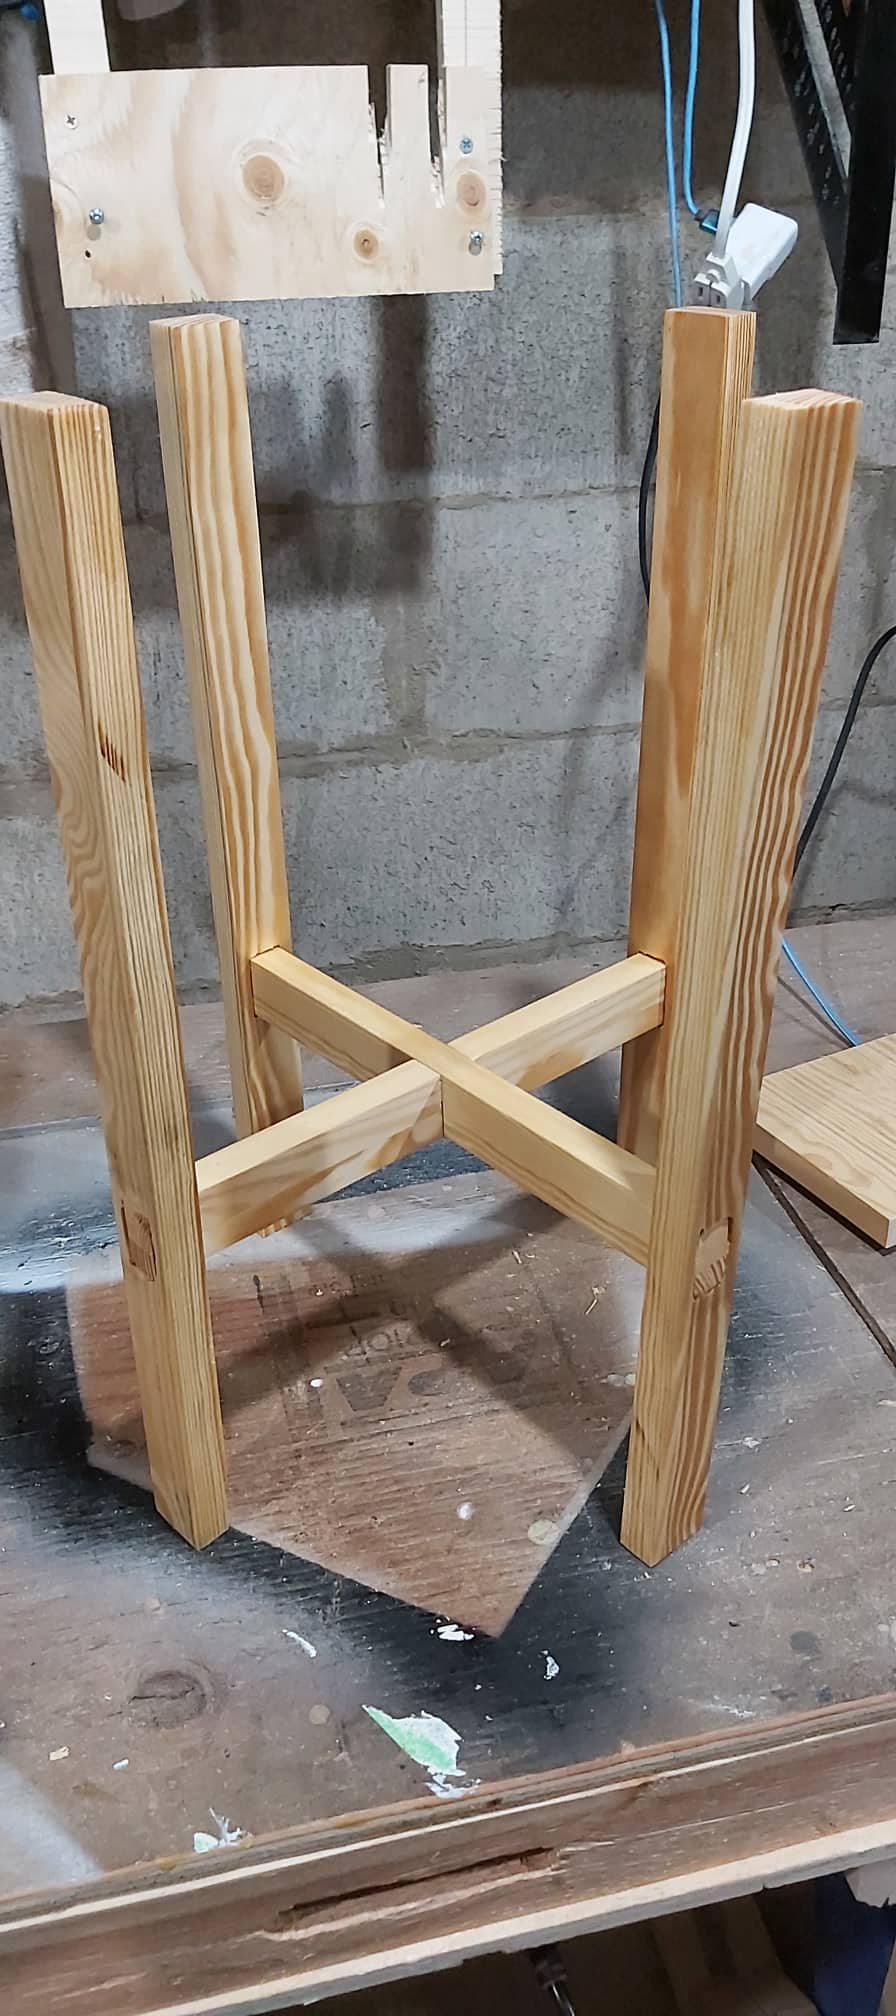
Over the weekend, I thought I’d make a little something for my girlfriend. While at it, I thought I’d try to make some tenon and mortises — or whatever this turned out to be.
For this project, I used:
Tools
Materials
| Qty | Material |
|---|---|
| - | 3/4″ pine plywood |
| - | #8 Screws – 2 1/2″ |
How I went about it
-
Rip and cut the pieces
I started by ripping 4 pieces of 18″ long for the legs and 2 more at 12″ to tie everything up together.
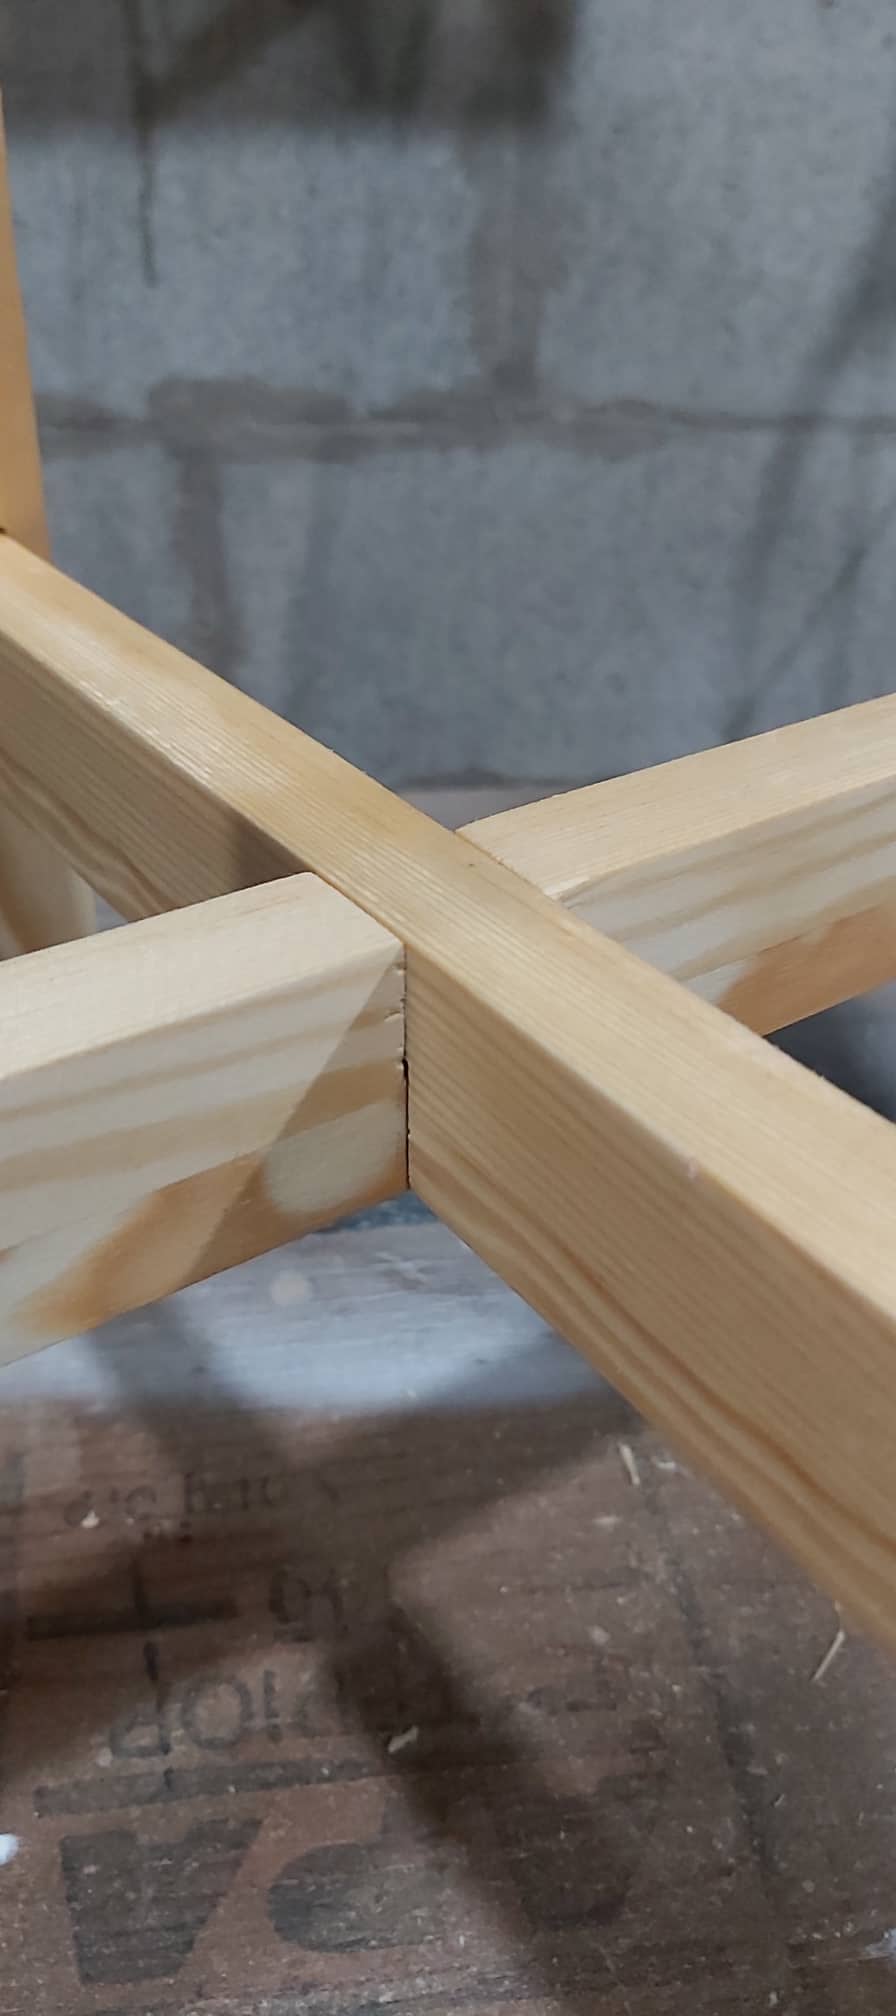
I also cut another 12″ piece to test out the proper depth for my half lap joint in the center.
Note: I *think* this is made of 3/4″ thick pine, but I am not 100% certain of the species as I only got it from someone’s lawn where it said “Free”.
-
Figure out the proper depth
I started by calculating the approximate height by eye and quickly noticed I was way too high. I lowered my blade and tried matching my pieces but I was now a little too low. Third time was a charm (Goldilocks!) and my depth was near perfect, so I went on and cut the work pieces.
-
Tenon and mortise time
Using a 3/4″ Forstner bit and my drill press, I cut a circle on both ends of where the inner legs will go. Due to the thickness of my wood, I figured I’d go full depth and rather and making proper tenons and mortises, I’d “simply” pass the inner pieces fully across the legs.
Then, I used a chisel to clean up my edges until I could fit my inner legs really nice and snug.
-
Sand. Sand. Sand.
The last step is something I, unlike many others, actually enjoy. I actually like the sanding process. (Either this is because I’m still new to this, or I am not doing it correctly!) From what I’ve learned, I understand the best practice is to move up by a scale of 50%, so I started with 80 grit, then moved up half of this and went up to 120. I used some 180 grit to finish it off ever so slightly on the corners of each piece.
-
Finish
I had some aerosol transparent satin varnish lying around so I tried it out on my test pieces from earlier (when I tried out the half lap joint) and I liked the result so I went on and applied it all over. I assembled everything and made a happy woman.